Newsletter Subscribe
Enter your email address below and subscribe to our newsletter

 ByJohn A
Anyone who has stood on a half-finished brick wall with an empty mortar tub knows the feeling. The crew is waiting, the mix is drying out, and somebody has to make a run to the supplier. Or the opposite happens: the job ends and half a pallet of unused bags sits in the corner, hardening in the damp. Both are avoidable, and both come from the same mistake, which is guessing the quantity of mortar instead of working it out.
This guide explains how mortar quantities really work, why bricklayers so often get them wrong, and how to plan a job so you buy the right amount the first time.
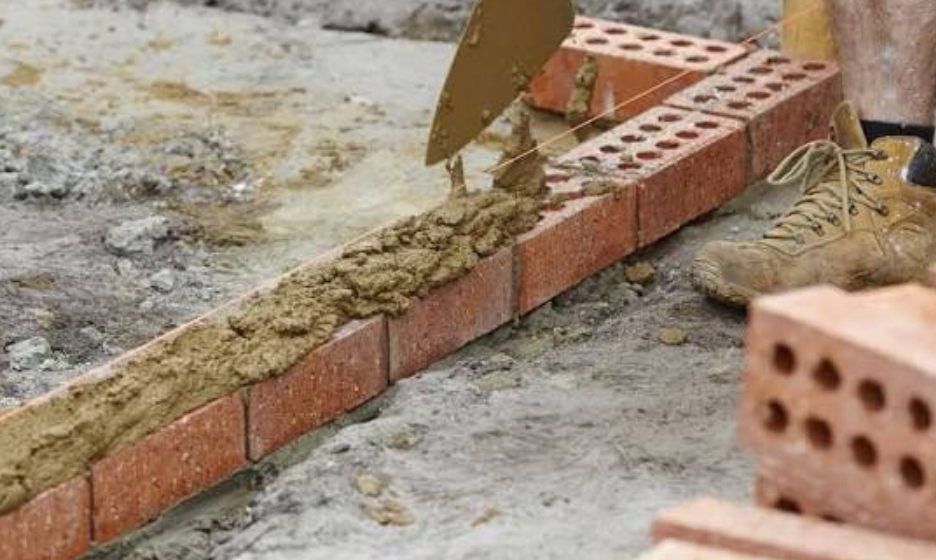
Bricks are easy to count. You measure the wall, multiply, and you have a number. Mortar is harder because it is not a fixed unit. It fills joints of varying thickness, soaks into porous bricks, falls off the trowel, and gets scraped away during pointing. Two bricklayers building the same wall can easily use noticeably different amounts of mix.
Most people make one of three mistakes:
See also: News JotechGeeks Latest Technology News and Updates
The logic is simple even if the arithmetic gets tedious. First you find the volume of the wall. Then you work out how much of that volume is brick. Whatever is left is mortar.
For example, take a standard brick of about 190 × 90 × 90 mm. Once you add a 10 mm joint around it, the “working size” becomes roughly 200 × 100 × 100 mm. The difference between those two volumes is the mortar that surrounds each brick. Multiply by the number of bricks and you get a wet volume of mortar for the whole wall.
Then comes the step people forget. To convert wet mortar volume into dry material quantity, you multiply by a factor. A figure around 1.25 to 1.33 is commonly used, and many site engineers simply round it to about 1.3. After that you split the dry volume according to your mix ratio. A 1:4 cement-to-sand mix, for instance, means one part cement and four parts sand, so the cement is one fifth of the dry total.
It is not hard, but doing it by hand for every wall, every opening, and every change in brick size gets old fast. That is why many builders now rely on a mortar calculator for brick to handle the numbers. You enter the wall dimensions, the brick size, and the joint thickness, and it returns an estimate in seconds. It also takes away the small arithmetic slips that cause real shortages on site.
Good estimates start with good measurements. Here is a routine that avoids most errors.
Measure length and height separately. Multiply them to get the gross area of the wall.
Subtract openings. Doors and windows do not need bricks or mortar, so take their area off. But be careful with very small openings. Subtracting a tiny vent hole saves almost nothing, and ignoring it keeps a small safety margin in your favour.
Check the wall thickness. A single-skin wall one brick wide uses far less than a double-skin wall or a one-brick-thick wall laid with bricks crosswise. Thickness multiplies everything, so confirm it from the drawings and do not assume.
Add the awkward parts. Corners, piers, returns, and cavity wall ties all affect quantity. If your plan includes pillars or decorative brickwork, treat them as separate small walls and calculate them individually.
Joint thickness is the single biggest hidden driver of mortar use. Increase the joint from 10 mm to 12 mm, and the mortar volume does not rise by a mere fifth; it rises by a bit more than that once you account for the joint area on both horizontal and vertical faces. On a large wall, that is the difference between a comfortable stock and a mid-afternoon supply run.
Also remember that joint thickness is a design and structural decision, not just a preference. Specifications usually set it, and bricklayers should stick to it. Uneven joints do not only waste mortar; they weaken the wall and spoil its appearance.
Not all bricks absorb mortar equally. A few things to keep in mind:
None of this changes the theory, but it explains why your actual consumption can drift away from a theoretical figure.
Even a perfect calculation gives you a theoretical minimum. Real jobs need a buffer. A common practice is to add around 10 percent to the mortar quantity, and some contractors go to 15 percent for complex or exposed sites. If you work in windy or hot weather where mix dries out quickly, lean toward the higher figure.
Think of that extra allowance as cheap insurance. Running short in the middle of a course can cause a visible colour or texture change in the finished wall if the replacement batch comes from a different delivery.
Suppose you are building a boundary wall that is 10 metres long and 2 metres high, a single brick thick (about 100 mm in our simplified case), using standard bricks and 10 mm joints.
The wall area is 20 square metres. With joints included, you can expect roughly 50 bricks per square metre for this kind of wall, which gives about 1,000 bricks. After adding about 5 percent for breakage and cutting, you would order somewhere near 1,050.
For mortar, a rough planning figure for this wall type is about 0.03 cubic metres of wet mortar per square metre, so the wall needs around 0.6 cubic metres wet. Multiply by 1.3 for dry volume and you get roughly 0.78 cubic metres of dry material. At a 1:4 mix, about one fifth of that is cement, around 0.16 cubic metres, and the rest, around 0.62 cubic metres, is sand. Add 10 percent for wastage and you have a realistic purchase list.
These numbers are approximate and will vary with your brick size, joint thickness, and workmanship, but they show the method clearly. Run the same inputs through a calculator and you should land in a similar range, which is a good way to sanity-check both your hand work and the tool.
Quantity is only half the story. The strength and durability of a wall also depend on the mortar mix.
A mortar stronger than the brick is not always better. If the mortar is much harder than the brick, cracks tend to run through the bricks rather than the joints, and repairs become more painful. Match the mix to the brick and the exposure, and follow local building standards.
A few habits make a noticeable difference in how smoothly a job runs:
Mix in manageable batches. Only mix what you can use within the working time. Re-tempering mortar with extra water weakens it.
Keep sand covered and dry. Wet sand changes your water ratio and makes batches inconsistent.
Use gauge boxes or buckets. Measuring by the shovelful leads to variation. Measuring by volume keeps every batch the same.
Store cement properly. Keep bags off the ground and out of the rain. Lumpy cement has already started reacting and should not go into structural work.
Track usage on day one. After the first few courses, compare what you actually used with what you planned. If there is a gap, adjust your order early.
Accurate estimating is not about being fussy. It saves money, reduces trips to the supplier, keeps the crew working, and gives a more consistent finished wall. For homeowners tackling a garden wall, it means avoiding awkward leftover bags. For contractors, it means tighter quotes and fewer disputes over materials.
The best approach is to combine good measurement, sensible allowances, and a reliable calculation method, whether that is a spreadsheet, a notebook, or an online tool. Then watch how your first day actually goes and refine the numbers.
Brickwork rewards patience and preparation. Mortar is a small line item compared with bricks and labour, but it affects strength, appearance, and schedule more than most people expect. Take accurate measurements, respect joint thickness, convert wet volume to dry correctly, and always keep a modest buffer. Do that, and you will spend less time worrying about supplies and more time building a wall that lasts.